Applying Operations
The options in the Operations box let you fill the inner areas of a selected region of interest, add or remove clipped regions, as well as interpolate 2D regions to create a 3D region of interest.
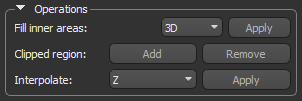
Operations
After creating a region of interest with a range of data, you may notice that pixels within inner areas of the ROI were not included in the segmentation. To correct this omission, you can fill internal, enclosed portions of a selected region of interest.
| Description | |
|---|---|
| 3D | Fills all internal, enclosed portions of the selected region of interest in all axes. |
| 2D (X) | Fills all internal, enclosed portions of the selected region of interest along the X-axis. |
| 2D (Y) | Fills all internal, enclosed portions of the selected region of interest along the Y-axis. |
| 2D (Z) | Fills all internal, enclosed portions of the selected region of interest along the Z-axis. |
- Select the required region of interest in the Data Properties and Settings panel.
- Choose a fill operation in the Fill inner areas box.
- Click the Apply button.
Subvolumes defined by a clipped region on can be added to or removed from a segmentation.
- Select the required region of interest in the Data Properties and Settings panel.
- Click the Clip
 button in the lower section of the panel. This option is available in the Clip box.
 - Adjust the Clip box on the 2D or 3D views of the dataset, as required (see Clipping).
- Do one of the following:
- Click the Add button to add the clipped region to the selected region of interest.
- Click the Remove button to remove the clipped region from the selected region of interest.
This option for regions of interest lets you interpolate 2D regions through volumetric image data to create a 3D region of interest. You can choose the direction of the interpolation. For best results, the feature you select for interpolation should be regularly shaped, such as a cylinder or sphere.
In the following example, a series of 2D regions were defined on a number of slices in the XY oriented view (left) and then interpolated in the Z axis. The results of the interpolation is shown in an XZ oriented view (right).
Interpolated region of interest

- Define a series of 2D regions on the feature of interest that you need to segment.
- Select the direction of interpolation in the drop-down menu.
- Click the Apply Button.
The 2D portions of the region of interest are interpolated through the image stack.


